 |
 |
 |
|
WORK IN PROGRESS — DO NOT PURCHASE. Description and configuration are being developed. The displayed price is a placeholder.
BrewHardware • Modular vessel washing The Inside JobYour brew kettle.
Your pump.
A better way to wash kegs. Put the equipment you already own to work. The Inside Job adds the support, sprayer, and plumbing that turn your electric brewing setup into a recirculating keg washing station. Find your setup ↓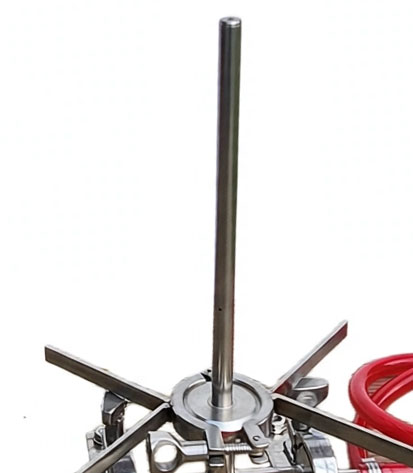 Standard nozzle and Launch Pad shown. Assembly varies by setup.
You supply the brewing equipment. We supply the missing pieces.For a heated wash loop, use your kettle, heating element, temperature controller, and pump. Cleaner travels from the kettle through the pump and sprayer, washes the inverted vessel, then drains back into the kettle. For rinsing, a separate assembly can run from a hot-water hose in your utility sink.
Reuse your investmentKeep using your existing basin, heat, controls, and pump. Wash more than the shellThe liquid flush loop sends cleaner through the keg’s liquid post, poppet, and long dip tube. Fit the vessels you ownChoose the support and inlet your setup needs, rather than buying every accessory. Build around your brewery A few questions. The right pieces.Start with what you clean, then how you want to work. Expand each question to compare the choices.
01 What will you wash?Your vessels determine the support above the base.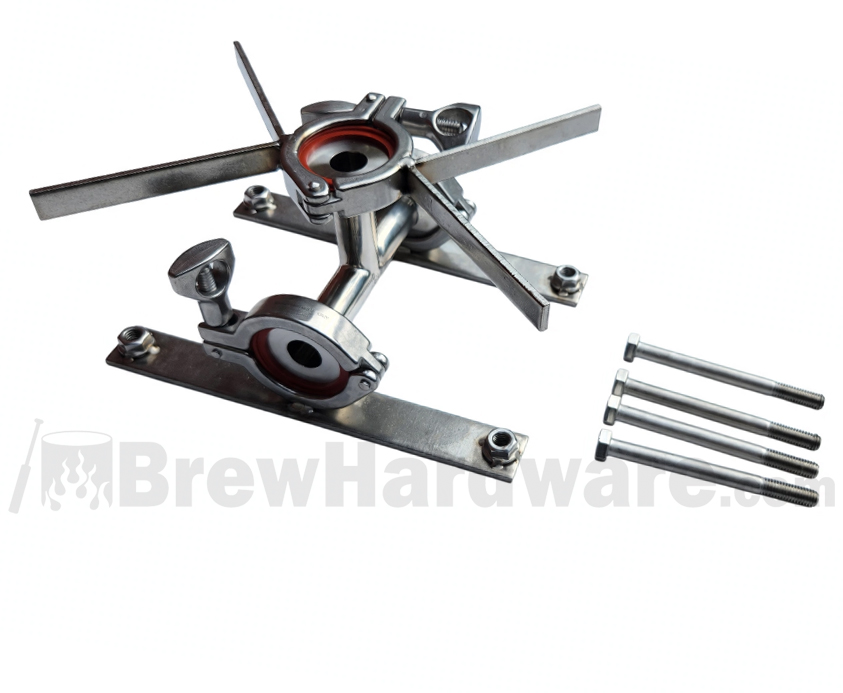 Launch PadFor rubber-top corny kegs and suitable carboys or fermenters. The crossed bars provide an easy place to land the inverted vessel. Some carboys need an additional stabilizing drying base. 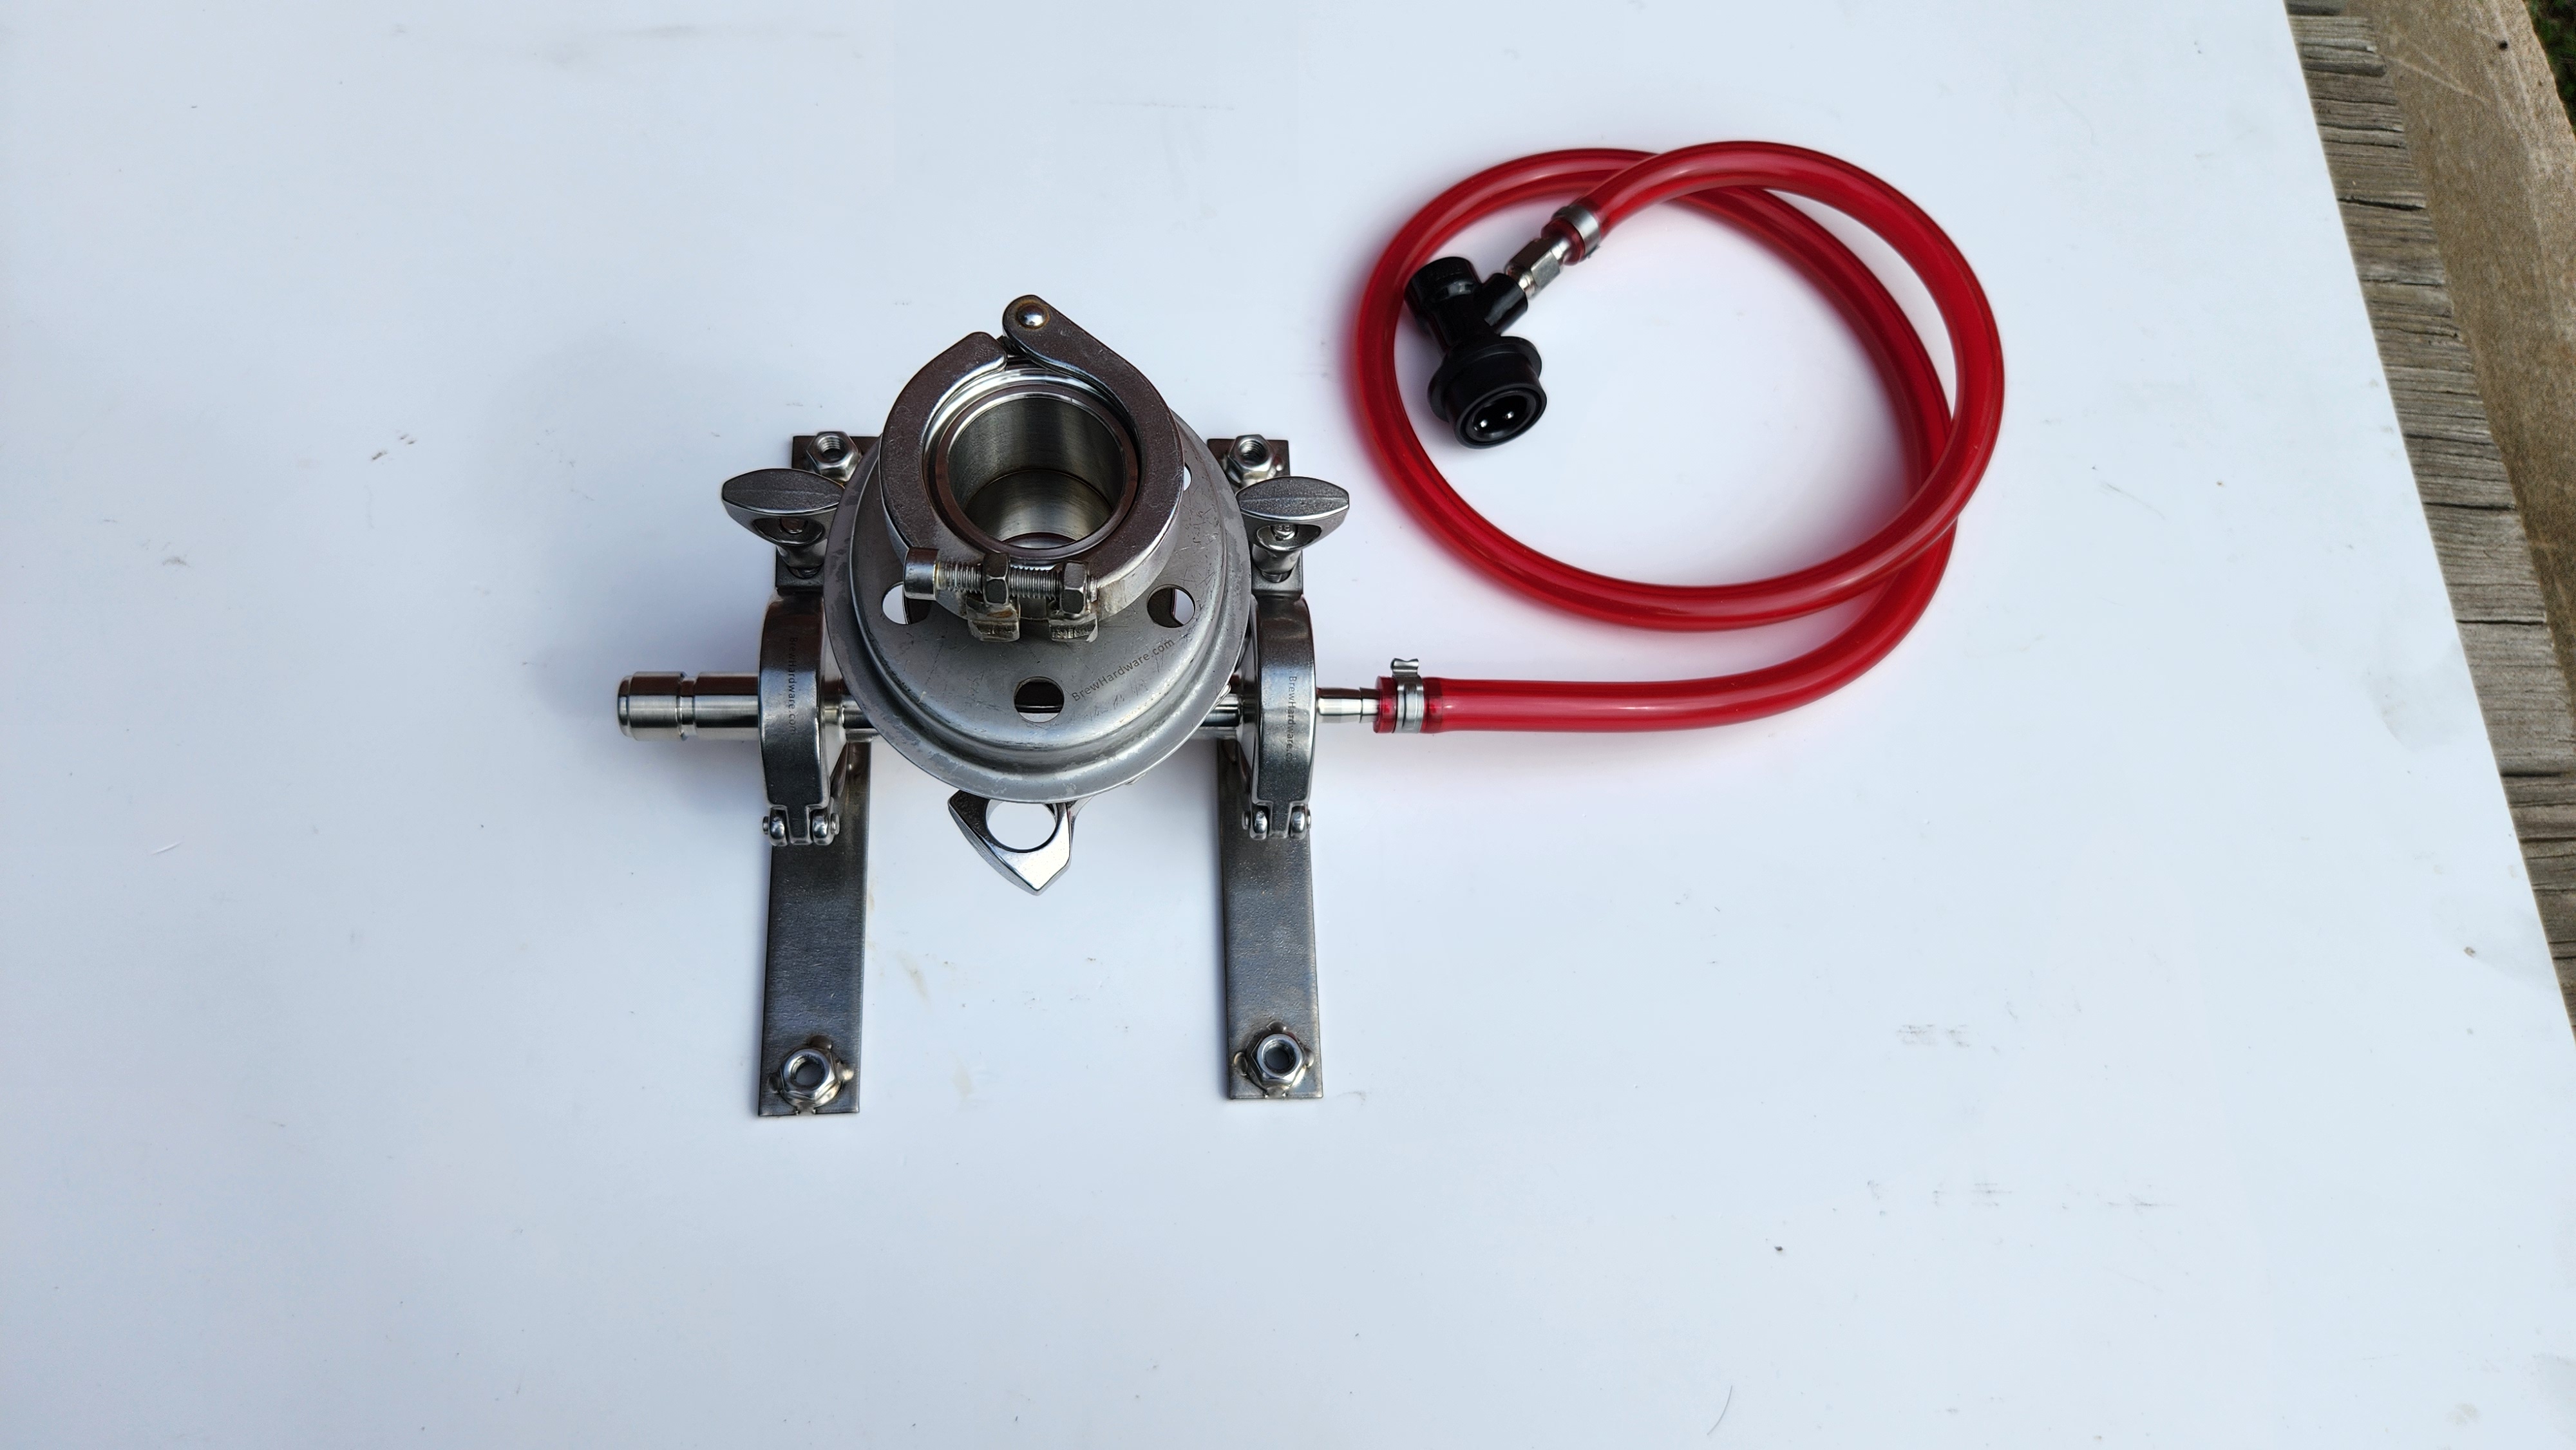 Single-strap keg adapterFor kegs without rubber top handles. This oval insert supports the keg at its lid opening. Its compact clamp adds fabrication cost, so choose it when your kegs need it. It does not support carboys. Have more than one vessel style?- Rubber-top + single-strap kegs: both supports make loading easier. The oval adapter alone handles both keg styles, but you must rotate the keg to align its opening—sometimes out of sight inside the kettle.
- Single-strap kegs + carboys: you need both supports.
Use one nozzle per station. Transfer it when changing between supports. 02 How will you feed the station?Choose Overboard or a hose-fed connection.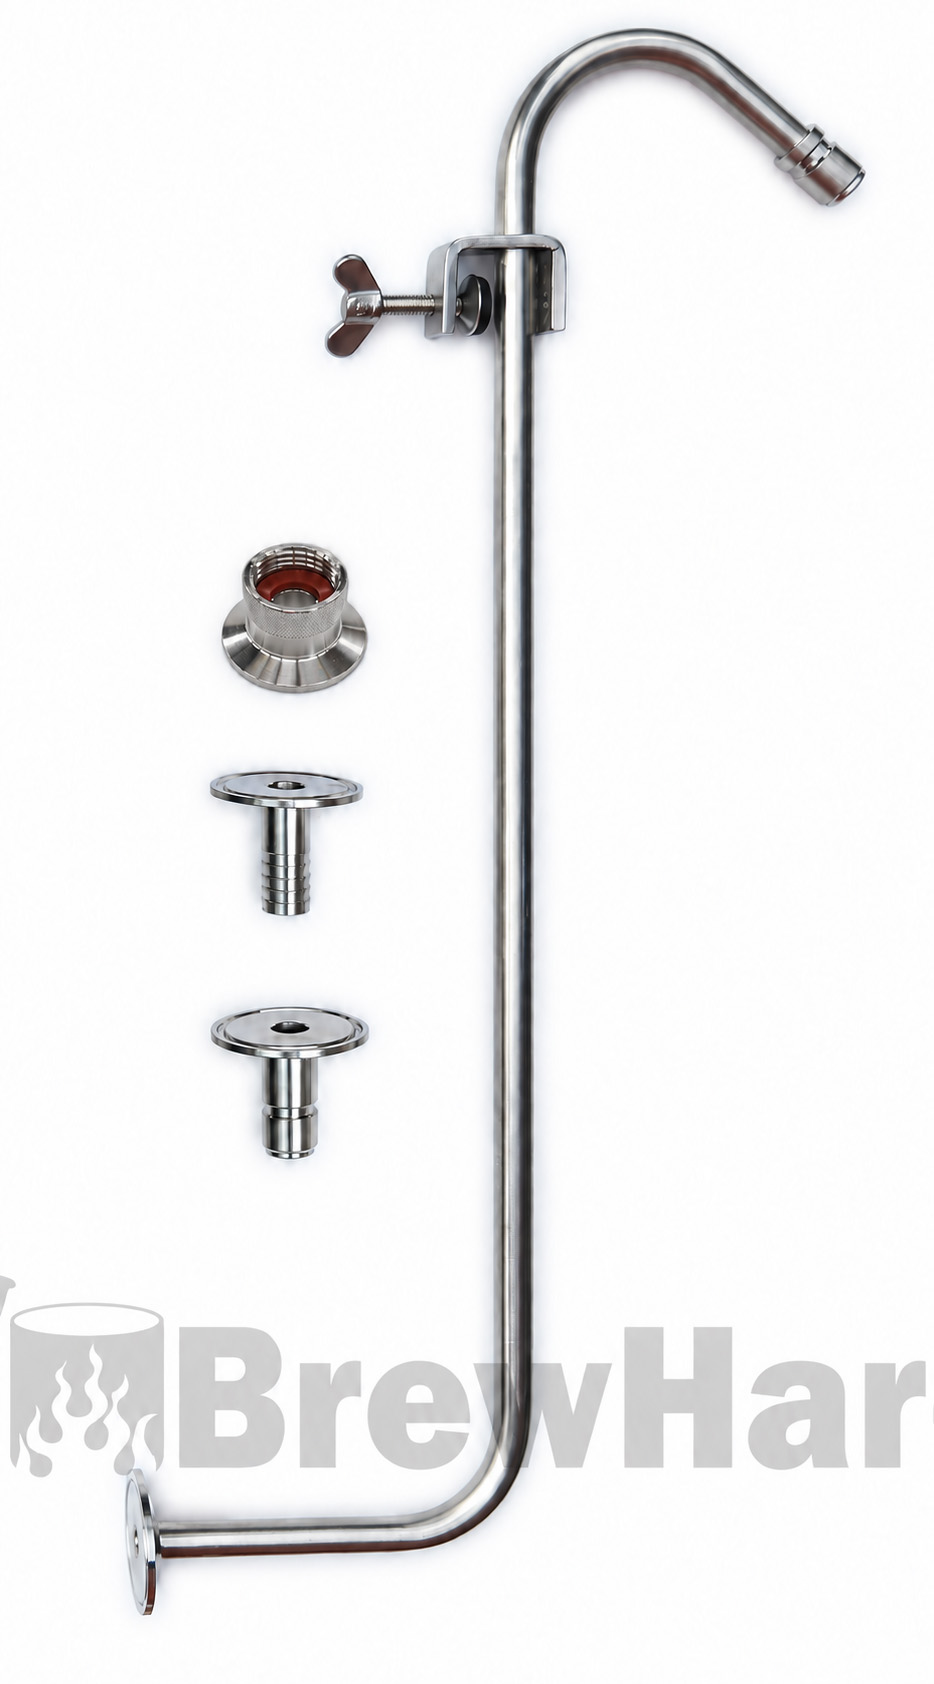 Overboard — over-the-rim kettle supplyThe rigid stainless inlet clamps to the base and kettle wall, placing the hose connection outside the kettle. Choose a welded male quick disconnect (MQD) or welded male Camlock at the top to match your hoses. It avoids a hose bending over the rim and adds stability. Our recommended starting point for an over-rim kettle setup. Hose-fed — sink rinsing and other hose connectionsChoose a 5/8″ hose barb, male quick disconnect (MQD), male Camlock, or female garden hose thread inlet to match your hose. These are appropriate for an in-sink rinse station, a kettle fed through an existing side port, or another hose-fed application. Have a slop sink faucet or laundry supply with male garden hose threads? - Standard garden hose: Its female end connects to the water supply; its male end connects to the washer. Choose the 1.5″ TC × Female Garden Hose adapter (TC15XFGH) for the washer inlet.
- Hose with female Camlock couplers: Choose the 1.5″ TC × male Camlock adapter at the washer inlet. The supply end of the hose also needs a compatible connection.
- Hose with BrewHardware BLQD connectors at both ends: Choose the MQD inlet on the washer and convert the water supply to MQD with a female garden hose thread × MQD adapter.
The water-supply adapter is a separate connection from the washer inlet. Match both ends of your hose before choosing your fittings. 03 What will the base rest on?Use an existing platform, or add clearance above the element.No legs needed — existing support or clear floorA BIAB false bottom can provide a stable platform above your immersion heating element. A suitable sturdy basket can also support the base. For a sink floor or kettle floor without an obstructing heating element, legs are not needed. Verify support and fit in your setup. Immersion element + no BIAB false bottom → Add legsIf your kettle has an immersion heating element and no BIAB false bottom to provide clearance above it, choose legs to raise the base over the element. The base has welded M8 nuts; the underside is drilled when the leg option is ordered. Measure clearance, not leg length.Measure from the kettle floor to the highest point of the heating element. Add at least ½ inch, then choose a clearance equal to or greater than that result. 2¾″ / 3¼″ / 4¼″ / 5½″ Dimensions are clearance beneath the base. Without-leg bases are not drilled underneath for legs. Need more than 5½ inches? Contact us before ordering. 04 Which cleaning hardware do you need?Start with the standard nozzle and the liquid flush loop for kegs.Standard jet nozzleOur starting point for each station. A machined tip delivers a strong main jet; four small side holes target residue near the keg opening. Cover those holes with the supplied silicone sleeve and clamp to concentrate flow on the main jet. Sized to accommodate 2.5-gallon and larger kegs. Already own a compatible sprayer?You may be able to reuse your own 1.5-inch TC spray/CIP assembly. Check both the connection and vessel opening before choosing your setup. CIP balls do not fit through glass-carboy necks. 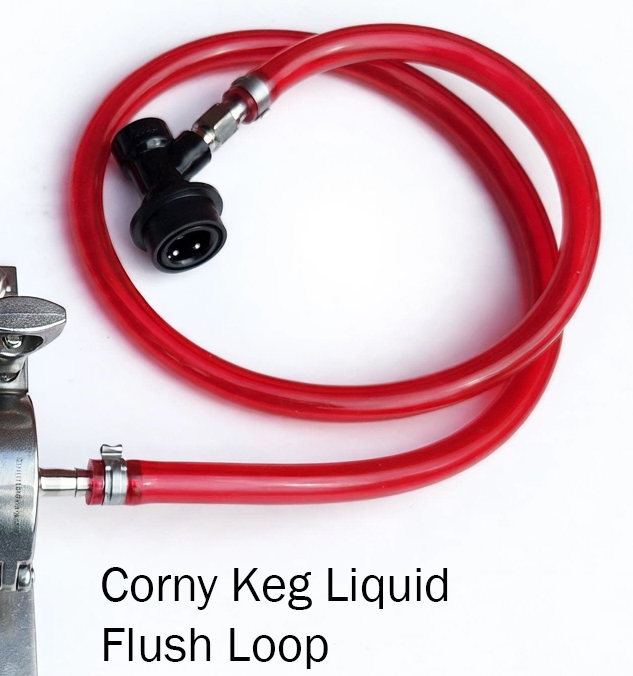 Liquid flush loopRecommended whenever you wash or rinse corny kegs. Connect to the liquid-out post to flush the post, poppet, and long dip tube, reducing the need for routine disassembly. For a carboy-only setup, this port is closed with a blank cap. Includes a 1.5-inch TC × 3/8-inch barb adapter, 3 feet of tubing, and CM Becker liquid ball-lock QD. With a weaker pump, connect the keg’s liquid QD for the final few minutes of the wash. The core of every station One base. A setup that fits.The stainless tee manifold has three 1.5-inch tri-clamp connections. Welded clamp-and-bar assemblies hold the plumbing and vessel support together. Configure what sits above it, how cleaner gets in, and what holds it clear of your element. We started by building dedicated keg washers for homebrewers who were ready to retire their least favorite brewery chore. Each custom build meant hours of cutting, bending, and welding. The Inside Job takes what we learned and standardizes the labor-intensive pieces, so you can put together a capable washing station around equipment you already own.
Why add a dedicated rinse station?Our recommended two-station workflow. Configure and order each station separately.Kettle wash stationUse your kettle and pump for heated detergent washing. You can start with this station and handle pre-rinsing and post-rinsing using your existing method. Add a sink rinse stationKeep a second, complete assembly connected to hot water in the sink. Move each keg through pre-rinse, heated wash, and hot post-rinse without moving or reconnecting the washer hardware. Why we recommend a wash + rinse pairA quick pre-rinse dislodges thick sediment before it enters the wash station, keeping your detergent solution cleaner. After the heated wash, move the keg to the dedicated rinse station. It makes post-rinsing less labor intensive by replacing the fill, shake, dump, repeat routine. With the liquid flush loop connected, fresh rinse water also flushes residual PBW from the dip tube, liquid post, and poppet. While one keg washes, pre-rinse the next. Each station has its own nozzle, vessel support, inlet, and appropriate flush hardware, so the process keeps moving without swapping parts between stations. Building a wash + rinse pair? Add each station separately.Configure and add your wash station to the cart first, then return to this page to configure and add your rinse station. Each configuration is for one station; a pair requires two separately configured assemblies, each with its own price. This lets you choose the right connections and support for each location. Questions about your kettle, keg style, or connections? Contact BrewHardware with your vessel details and measurements so we can help you choose the right pieces.
|
|
|
 |
|
 |
|


